

Since the rise of mass-produced bedroom sets in the mid-20th century, builders have often paired solid wood frames with stamped metal handles to cut factory costs. Replacing those factory fittings is the fastest way to transform a piece, provided you evaluate the drawer structure and hole spacing first.
Quick Answer and Dresser Makeover Ideas Overview
Quick Answer: Evaluating Your Dresser First
The most practical dresser makeover ideas start with a quick structural inspection before you shop for new knobs or pulls. Pull out each drawer to test the wooden runners or metal slides, press gently on the frame corners to verify stability, and inspect the surface for lifting veneer or deep water rings. Knowing whether your piece has clean wood, worn paint, or loose joints tells you right away if you need a simple hardware swap, a fresh coat of primer and paint, or a full wood refinishing.
Choosing Your Makeover Scope
- Choose a hardware-only update if: Your wood stain or painted finish is still in good condition, the drawers glide smoothly, and you want to update the style in under an hour by matching the existing screw holes.
- Choose a paint-and-pull refresh if: The dresser has dated laminate, mismatched wood patches, or old hole spacings you want to fill and redrill for a completely different handle layout.
- Choose a full structural restoration if: The wood veneer is peeling, glue joints wobble when you pull a heavy drawer, or wax-coated wooden tracks need sanding and repair before new hardware can work properly.
Key takeaway: Checking drawer weight and existing hole condition first prevents ordering delicate hardware that cannot support daily use.
What to Measure Before Replacing Drawer Hardware
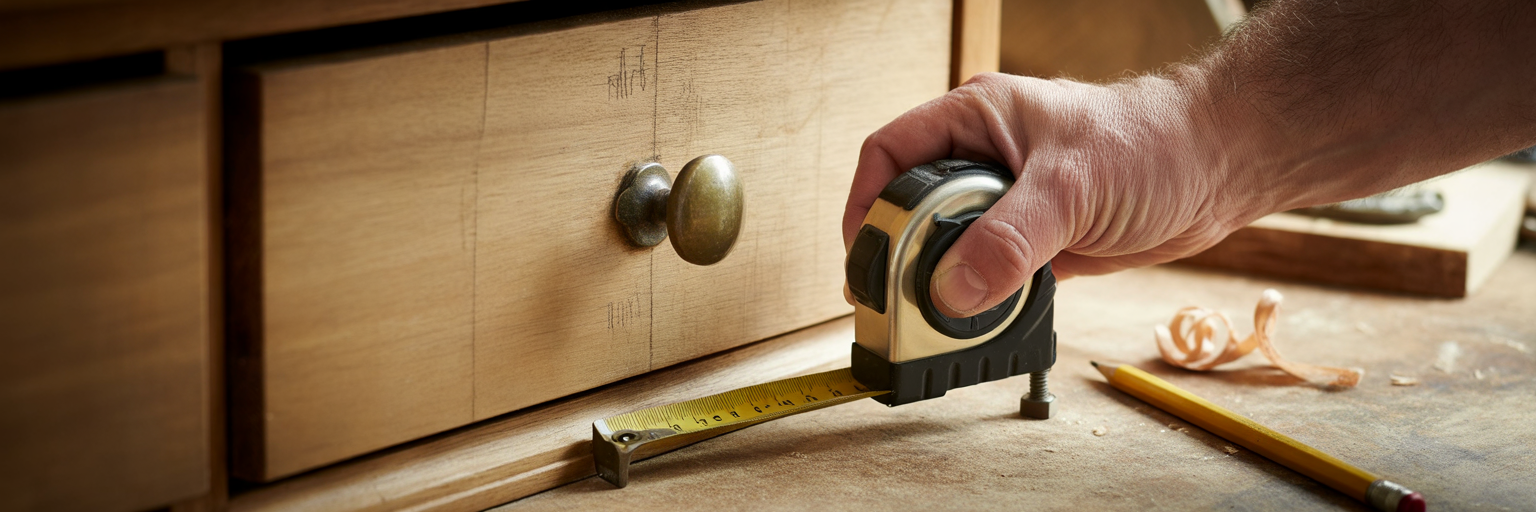
Understanding Center to Center Hole Spacing and Projection
When replacing dresser hardware, accurate measurements save you from return shipping and extra carpentry. Knowing how to measure drawer pulls starts with center to center hole spacing, which is the exact distance from the middle of one screw hole to the middle of the second screw hole. Many American vintage and traditional dressers use standard imperial increments like 3 inches, 3.75 inches, 4 inches, or 5 inches. In contrast, IKEA dressers and imported furniture almost always use metric spacings such as 96mm (about 3.78 inches) or 128mm (about 5.04 inches). Mixing up 3.75 inches and 96mm seems minor on a ruler, yet the bolts will bind against the wood threads during installation.
Beyond hole spacing, measure your drawer front thickness so the mounting screws sit flush without bottoming out. You should also check the hardware projection, which measures how far the handle sticks out from the drawer face so your knuckles have comfortable room to grip.
When to Reuse, Cover, or Fill Existing Holes
Reusing your current holes is the cleanest route whenever the finish is intact. As highlighted in Apartment Therapy's practical guide, checking how old hardware sits against the wood helps you spot sun fading or circular indentations left behind by previous knobs. If your old pulls left rings in the stain, installing decorative backplates (flat metal plates positioned behind a knob or pull) conceals surface wear without sanding, a technique we cover in our guide on fitting cabinet knobs and pulls with backplates. When changing hole spacing entirely, pack the old holes from both sides with stainable or paintable wood filler, let it cure overnight, and sand flush with 220-grit sandpaper before drilling new pilot holes.
- Remove one existing handle and measure the center-to-center distance in both inches and millimeters.
- Measure the thickness of the drawer face (including any decorative trim panel) to confirm screw length.
- Measure the width and height of every drawer tier from top to bottom.
- Check the interior drawer box for dovetail joints or metal bracket obstructions where new screws might enter.
How to Choose Knobs and Pulls by Drawer Size and Use
Comparing Knobs, Bar Pulls, Ring Pulls, and Cup Pulls
Selecting the best pulls for dresser drawers depends as much on mechanical leverage as visual style. Single-screw cabinet knobs work well on lightweight upper drawers built for socks, scarves, or jewelry. Standard bar pulls and bridge pulls attach at two points, distributing pulling force across the wood face so wide lower drawers stuffed with heavy denim or sweaters do not warp or loosen over time. You can compare how different handle profiles feel in the hand in our practical guide on choosing bar pulls and bridge pulls.
Bail pulls (handles with a swinging drop loop) and ring pulls bring heritage character to antique bureaus, though stationary bar handles are faster to grab one-handed in busy bedrooms. Cup pulls, also called bin pulls, are hooded half-moon handles gripped from underneath. Sturdy options like our antique bronze cup pulls for drawers offer comfortable downward leverage and prevent loose clothing from snagging on protruding handle ends.
Sizing Rules of Thumb for Narrow and Wide Drawers
To keep your dresser looking balanced, aim for a single centered pull that spans roughly one-third the width of the drawer front. Once a drawer exceeds 30 inches wide, installing two pulls centered on the left and right halves stops the drawer slide from racking side to side when pulled open.
| Drawer Width | Recommended Hardware Setup | Ideal Pull Length (Proportional Rule) | Best Hardware Types for Load |
|---|---|---|---|
| Under 12 inches | 1 centered knob or 1 compact pull | 3 inches to 3.75 inches (or 1-inch to 1.25-inch knob) | Single round knobs, small ring pulls, mini cup pulls |
| 12 to 30 inches | 1 centered pull or 2 evenly spaced knobs | 4 inches to 6 inches (roughly one-third of drawer width) | Standard bar pulls, wide cup pulls, bail pulls |
| Over 30 inches | 2 pulls or 2 substantial knobs (placed centered on left and right halves) | Two 3.75-inch to 5-inch pulls (or one 8-inch+ architectural pull) | Two-screw solid brass bar pulls, heavy-duty cup pulls |
Coordinating Hardware Materials and Finishes With Wood and Paint

Pairing Brass, Ceramic, Wood, and Leather With Dresser Surfaces
Choosing the right material turns a basic storage piece into furniture that fits your room's lighting and color palette. Warm metals from our collection of solid brass cabinet pulls and knobs create crisp visual contrast against deep navy, charcoal, or sage green paint while warming up dark walnut stains. If you are refreshing a cottage bureau or a child's painted dresser, glazed ceramic cabinet knobs and pulls introduce soft pattern and color without sharp metal edges. Meanwhile, antique bronze, leather loops, and wood-combined handles blend naturally with oak, cherry, and mid-century teak grains. Much like finding the style that matches your personality in personal art, selecting distinctive hardware textures lets you express individual taste on an everyday bedroom piece without committing to permanent structural modifications.
| Hardware Material / Finish | Best Dresser Surface Pairings | Tactile Feel and Maintenance | Ideal Room Aesthetic |
|---|---|---|---|
| Solid Brass & Brushed Gold | Deep navy, forest green, matte black paint, or dark walnut wood | Solid weight; wipes clean with a soft dry cloth | Classic, transitional, modern vintage, Art Deco |
| Antique Bronze & Aged Brass | Warm oak, cherry wood, distressed cream, or warm gray paint | Subtle textured patina that hides daily fingerprints well | Heritage, farmhouse, rustic, traditional |
| Ceramic & Porcelain | Pastel paint, crisp white, light pine, or upcycled children's dressers | Smooth glazed grip; inspect mounting screw tightness periodically | Cottage, whimsical, vintage, coastal |
| Wood-Combined & Leather | Whitewashed wood, matte sage, or minimalist birch veneers | Warm, soft touch; comforting grip for bare hands in bedrooms | Scandinavian, mid-century modern, organic minimalist |
How to Approach Mixing Knobs and Pulls
When mixing knobs and pulls on the same dresser, keep the finish consistent while varying the shape by drawer function. A classic approach places small round knobs on the shallow top drawers and wider bar or cup pulls on the heavy lower drawers. Because bedroom bulbs and natural window light shift how gold, bronze, and wood tones look at home, ordering through the JRM Accessories Sample Program lets you hold finishes directly against your paint swatches before committing to a full set.
Styling takeaway: Match the undertone of your dresser hardware (warm brass and bronze versus cool chrome and nickel) to nearby bedside lamps or mirror frames so the room feels cohesive.
Planning Pull Placement, Quantities, and Your Project Budget
Testing Placement and Installing Hardware Safely
Good placement geometry makes a DIY dresser upgrade look professional. On flat-front drawers, center your hardware horizontally and vertically, though placing pulls slightly above true vertical center on deep bottom drawers looks more balanced from a standing eye level. On Shaker or recessed-panel drawers, center the hardware within the inner panel rather than placing it on the narrow top rail.
Before touching a drill, run strips of blue painter's tape across the drawer fronts, mark your pencil lines, and step back across the room to verify alignment. Use a rigid plastic or cardboard drilling template to keep every drawer identical. Always tighten mounting screws from the inside using a manual hand screwdriver rather than a power drill, which prevents cracking delicate wood veneers, chipping ceramic glazes, or stripping internal brass threads.
Calculating Quantities and Project Timelines
Count your total drawers and decide early whether wide lower drawers will take one centered pull or two side pulls. When ordering natural materials like our wood cabinet pulls and knobs or hand-glazed ceramic knobs, consider adding 1 to 2 extra pieces to your cart so you can match wood grain variations or keep a spare on hand. Hold off on filling old holes or stripping your dresser until your shipment is in your hands. Factor in JRM Accessories' standard order processing of 1 to 3 business days and delivery window of 5 to 8 days after shipment so your bedroom storage stays functional until work begins.
- Hole count check: Confirm total single-hole knobs versus two-hole pulls required across all tiers.
- Finish consistency check: Verify all selected pieces share the same finish family or intentional material pairing.
- Fastener check: Compare your drawer front thickness against the included screw lengths to see if longer break-away screws are needed.
Common Dresser Hardware Mistakes and Frequently Asked Questions
5 Common Dresser Makeover Mistakes to Avoid
- Ordering pulls that overpower narrow frames: Large backplates or chunky handles that hang over beveled drawer edges look crowded and catch on fingers.
- Drilling without testing placement with tape: Eye-balling measurements without painter's tape often leads to crooked pulls across side-by-side upper drawers.
- Mixing incompatible metal undertones: Pairing yellow-toned bright brass with cool bluish-gray paint or chrome bedroom fixtures can look accidental unless bridged by warm wood accents.
- Over-tightening screws with a power drill: High torque easily snaps bolt heads or crushes soft pine and particleboard drawer cores.
- Guessing metric vs. imperial hole spacing: Assuming a 96mm hole spacing will fit a standard 3.75-inch pull causes crooked bolts and damaged drawer fronts.
Frequently Asked Questions
Can I replace two-hole drawer pulls with single knobs?
Yes, you have two options. If your drawer is wide enough, you can install two individual knobs directly into the existing left and right holes, or you can fill both holes with wood filler, sand smooth, paint over the repair, and drill a single centered hole.
What size pull works best on a 30-inch wide dresser drawer?
Following the one-third proportion rule, a single centered pull between 8 and 10 inches long works well, or you can install two 3.75-inch to 5-inch pulls centered on the left and right halves of the drawer.
Should all knobs and pulls on a dresser match?
They do not need to be the exact same shape. Combining knobs on small upper drawers with bar pulls or cup pulls on deep lower drawers works well, provided they share a coordinated finish or complementary material palette.
How do I keep new knobs from spinning or loosening on thin drawer fronts?
Add a small metal washer and a toothed lock washer on the inside of the drawer box before tightening the screw by hand. This takes up extra slack on thin wood panels and keeps single-post knobs from twisting during daily use.
What if the hardware finish looks different in my room than on my screen?
Screen settings and bedroom lighting can change how brass, bronze, or ceramic tones appear. You can use the JRM Accessories Sample Program to test single pieces at home first, and full orders are backed by our 14-day return policy after you receive your items, subject to standard return conditions.
Ready to start your project? Grab a tape measure to check your current hole spacing, browse our coordinated drawer pulls and knobs, or order a few samples to compare materials against your dresser under your own bedroom lighting.


