

Changing your cabinet hardware is one of the most satisfying updates you can make in a kitchen. While the thought of drilling into your cabinets can feel a little intimidating, installing kitchen handles is a straightforward project that you can complete with confidence. With a bit of careful measurement and the right technique, you can achieve a professional and polished look that completely transforms your space.
Key Steps for Installing Kitchen Handles
For those who want a quick overview, here are the essential steps. Getting these right is the foundation for a flawless installation. We will explore each one in more detail to help you avoid any guesswork.
- Measure Correctly: Before you buy, you must know your "center-to-center" measurement, which ensures your new handles will fit existing holes or guides where you need to drill.
- Choose Your Placement: Decide where the handles will sit on your doors and drawers for a consistent and ergonomic layout.
- Use a Template: Create or buy a template to mark your drill holes accurately on every single cabinet, ensuring perfect alignment.
- Drill with Care: Use simple techniques to drill clean holes without splintering your cabinet finish.
- Secure by Hand: Attach your new handles with a screwdriver, not a power drill, to avoid damaging the hardware or your cabinets.
Following these steps will help you get the job done right the first time. Now, let’s walk through the details together.
How to Measure for New Cabinet Handles
Knowing how to measure kitchen handles correctly is the most critical step in the entire process. It prevents the frustration of ordering hardware that simply won’t fit, especially if you are replacing old handles.
The Most Important Measurement: Center-to-Center (C-C)
The single most important dimension for any cabinet pull is the center-to-center measurement, often abbreviated as C-C. This is the distance between the center of one screw hole to the center of the other. It is not the total length of the handle. Many people make the mistake of measuring the handle from end to end, only to find the screw holes do not line up. When you browse for hardware, the size listed (e.g., 96mm, 128mm, 5 inches) almost always refers to this C-C distance.
How to Measure for Replacement vs. New Installations
Your approach to measuring depends on your project. If you are replacing existing handles, simply open your cabinet door or drawer and measure the distance between the center of the two screw holes from the back. This is the C-C size you need to shop for.
For new installations on blank cabinets, you have more freedom. The handle's C-C size will determine where you drill your holes. You can choose a size that feels proportional to your cabinet doors and drawers. It is common to use a mix of different sizes of drawer pulls and knobs to create a balanced and functional kitchen, such as longer pulls for wide drawers and smaller knobs for upper cabinet doors.
Achieving Perfect Placement and Alignment
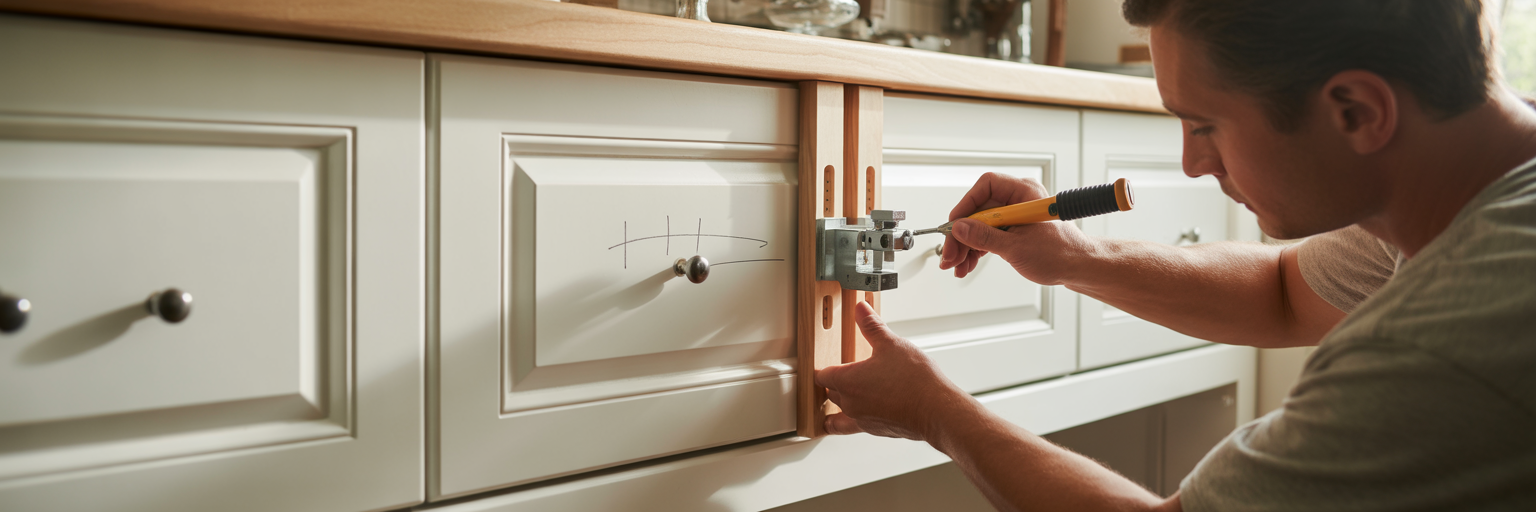
Consistent cabinet handle placement is what separates a DIY project from a professional-looking installation. While there are no strict rules, following some standard guidelines creates a clean, cohesive, and ergonomic result.
Standard Placement Rules for Doors and Drawers
For cabinet doors, handles are typically placed on the stile, which is the vertical frame of the door. The handle should be on the opposite side of the hinges. For drawers, placement depends on the height. Standard drawers look best with the handle centered, while taller drawers are often more comfortable to open when the handle is positioned in the top third of the drawer front. These small details make a big difference in daily use.
Why a Template is Your Most Important Tool
The secret to getting every handle in the exact same spot is using a kitchen handle installation template. You can buy an adjustable hardware jig or make your own from a piece of cardboard. Mark your C-C measurement on the template, decide on your placement, and then use it to mark the drill points on every door and drawer. As a trusted resource like Family Handyman points out, using a jig is critical for ensuring all handles are installed uniformly. For example, a set of minimalist solid brass and wood pulls looks best when perfectly aligned. Always use a small spirit level to double-check your marks before you drill.
| Cabinet/Drawer Type | Recommended Handle Placement | Why It Works |
|---|---|---|
| Base Cabinet Doors | On the stile, with the bottom screw hole aligned with the top of the bottom rail. | Easy to reach without bending down too far. |
| Wall Cabinet Doors | On the stile, with the top screw hole aligned with the bottom of the top rail. | Provides comfortable access at shoulder height. |
| Standard Drawers (under 12" tall) | Centered horizontally and vertically on the drawer face. | Creates a classic, balanced, and symmetrical look. |
| Tall Drawers (over 12" tall) | Centered horizontally, but placed in the top third of the drawer face. | More ergonomic to pull open and visually balances the height. |
This table provides common placement guidelines for a consistent and functional kitchen layout. Always test placement with a temporary adhesive before drilling.
The Right Way to Drill and Secure Your Hardware
Once you have measured and marked your drill points, it is time for the final step. The process of drilling holes for cabinet pulls is simple, but a few pro tips will help you get clean results without damaging your cabinetry.
First, place a piece of masking tape over the spot where you plan to drill. This helps prevent the drill bit from slipping as you start and reduces the chance of chipping the paint or finish. Next, and this is a crucial tip often shared by professionals, clamp a scrap piece of wood to the inside of the door or drawer where the drill bit will exit. This "backer board" supports the wood fibers and prevents "blowout," which is the ugly splintering that can happen on the back side. As noted in guides on how to install cabinet handles, this technique is key for a clean finish.
Always drill from the finished front side through to the back. Use a drill bit that matches the diameter of your screws. Finally, when it is time to attach the handle, use a manual screwdriver. It is tempting to use a power drill for speed, but it is far too easy to over-tighten the screws, which can strip the threads in the handle or even crack your cabinet finish.
Common Installation Mistakes to Avoid
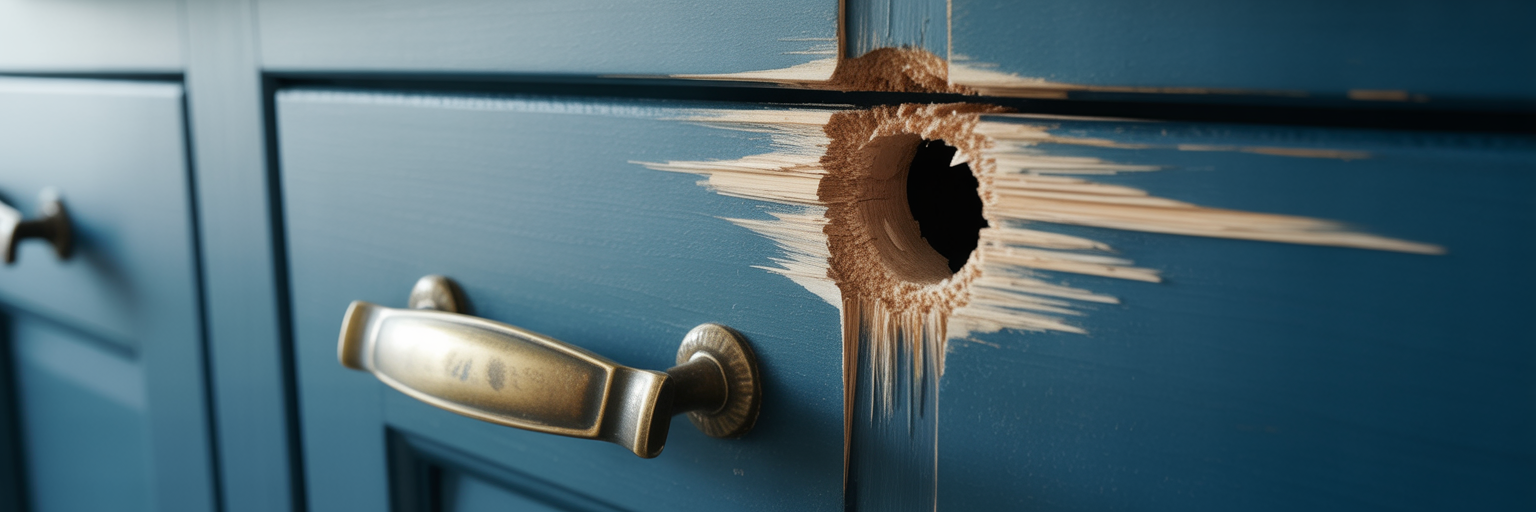
A successful project is often about avoiding common pitfalls. Here is a quick checklist of mistakes to watch out for when installing your new hardware.
- Measuring the wrong dimension. Always measure the center-to-center (C-C) distance between screw holes, not the handle's overall length. If you are unsure, it is always wise to browse different sizes of furniture hardware to see how C-C is specified.
- "Eyeballing" the placement. Without a template and a level, it is nearly impossible to get your handles perfectly straight and consistent. This is one corner you should not cut.
- Drilling too quickly. Using a dull drill bit or applying too much pressure can cause the wood to splinter and chip. Let the drill do the work and use a backer board for a clean exit hole.
- Over-tightening the screws. Using a power drill to secure the final screws is a common cause of stripped hardware and cracked finishes. Always hand-tighten for the last few turns.
Frequently Asked Questions About Handle Installation
What if I drill the holes in the wrong place?
Don't panic! For a small error, you can fill the hole with wood filler, sand it smooth, and touch it up with paint. For a larger mistake, you can often cover the old holes by choosing a new handle with a backplate.
Should all my kitchen handles be the same size?
Not at all. It is a very popular and effective design choice to mix sizes and styles. Many people use pulls on drawers for an easy grip and knobs on doors for a classic look. The key is to keep the finish consistent for a cohesive feel.
Do the screws that come with the handles always fit?
Our handles include standard-length screws that fit most cabinet doors and drawer fronts. However, if you have custom-built or unusually thick cabinetry, you may need to purchase slightly longer screws from a local hardware store.
How do I choose between knobs and pulls?
It comes down to function and style. Knobs, like a simple solid brass knob, offer a timeless look and only require one hole. Pulls provide a larger gripping surface, which can be more ergonomic, especially on heavy drawers, and often make a stronger design statement.
Your Next Step to a Flawless Finish
You now have the knowledge to tackle this project with confidence. Remember that careful measurement and the use of a template are your keys to success when installing kitchen handles. Taking your time at the start will ensure a beautiful result that you can be proud of for years to come.
With your plan in place, you can now enjoy the fun part: choosing the hardware that will bring your vision to life. We always recommend ordering samples to see how different finishes and sizes look in your home's unique lighting before committing to a full set. Happy renovating!


